Close,Up,Hands,Women,Wearing,Protect,Glove,Blue,Using,Liquid

How to clean a toilet using citric acid

Using citric acid to clean your toilet is an effective and environmentally friendly alternative to commercial cleaners.

Get your supplies together you are going to need citric acid powder, rubber gloves and a toilet brush or scrubber.

Use the citric acid as it is and pour directly into the toilet pan 100/200g. If the limescale build up is quite bad use more.

Pop the lid down and allow the citric acid to sit in the toilet bowl for at least 1 hour, for best results leave over night. This gives the acid time to break down stains, mineral deposits, and bacteria.

After the citric acid has had time to work its magic, scrub the toilet bowl thoroughly using a toilet brush or scrubber. Pay special attention to areas with stubborn stains or buildup.

Once you’ve thoroughly scrubbed the toilet bowl, flush the toilet to rinse away the citric acid solution and any loosened grime.

For particularly tough stains or buildup, you may need to repeat the process one or more times until the toilet bowl is clean and sparkling.

Using citric acid to clean your toilet is not only effective but also safe for the environment and your family.

Step,By,Step,Instruction,Of,Non,Toxic,Home,Cleaning,Detergent

Sustainable spring cleaning tips

As we welcome the vibrant energy of spring, it is the perfect time to refresh our homes. As more and more of us are choosing more eco friendly ways of looking after our homes let me share with you a few sustainable spring clean tips where every scrub and sweep contributes to a healthier environment.

Swap Out Single-Use: Replace disposable cleaning wipes with reusable cloths or microfiber towels. They’re washable and more eco-friendly.

DIY Cleaners: Make your own cleaning solutions using simple ingredients like white vinegar, bicarbonate of soda, citric acid and lemon juice. They’re effective, non-toxic, and reduce plastic waste.

Opt for Refills: Choose cleaning products that offer refill options to minimise packaging waste. Many companies now offer bulk refill stations or concentrate refills.

Donate or Upcycle: Instead of throwing away unwanted items, donate them to local charities or upcycle them into something new. It’s a great way to reduce waste and give items a new life.

Energy-Efficient Cleaning: Use cold water when using the washing machine, clothes will still wash well at just 20 degrees and air dry clothes on the washing line or on an airer in a well aired room instead of using the dryer to save energy and reduce your carbon footprint.

Declutter Mindfully: Before tossing items, consider if they can be repurposed, repaired, or recycled. Decluttering responsibly helps reduce landfill waste and don’t forget to donate, local facebook selling groups are great for gifting on and charity shops don’t just take clothes they will also take good quality kitchen items such as bread makers and coffee machines.

Plant-Based Brushes: Choose cleaning tools made from sustainable materials like bamboo or recycled plastic. They’re durable and better for the environment. Bamboo dusters can last years and are easy to keep clean.

Support Eco-Friendly Brands: Look for cleaning products from companies committed to sustainability, with eco-friendly packaging and ingredients. One of my favourite eco brand is Miniml they have a great range of products in refillable packaging.

Compost Food Scraps: Instead of throwing food scraps in the trash, compost them to reduce waste and create nutrient-rich soil for your garden.

Share and Borrow: Borrow cleaning tools or equipment from neighbour’s or friends instead of buying new ones. Sharing resources helps minimise consumption and waste. For example carpet cleaning machines are items we probably only use 3 or 4 times a year and not everyone has the storage for one.

Let’s embrace a greener approach to spring cleaning for a healthier planet! 🌍

Tablets,For,Cleaning,Of,Dental,Prostheses,Isolated,On,White

Amazing ways to clean with Denture tablets

Not many of us keep a supply of denture tablets in our home, but we should all keep them in our cleaning caddies because these little tablets are magic!

The best news is that denture tablets are super cheap you just need to know where to find them.

Stained Food Containers

Everyone has at least one plastic food container that has never been the same since you stored spaghetti in it that one time. But you can use denture tablets to help remove those tomato sauce stains! Just fill the container with warm water and add 1-2 denture cleaning tablets. Wait for about an hour, then rinse and dry.

Unclog a plug hole

Drop a few tablets into a slow-running drain and run the water until the problem clears. For a more stubborn clog, drop three tablets down the sink, follow that with one cup of white vinegar, and wait a few minutes. Now run hot water down the drain until the clog is gone.

Narrow Vases & Bottles

Denture tablets are great for cleaning out containers with narrow openings. Just fill the vase or bottle with warm water and add 1-2 denture tablets, depending on the size of the item. Wait an hour or two then rinse well.

Toilets and Sinks

Toilet bowls and bathroom sinks respond well to the cleaning agent in denture tablets. Drop a denture tablet into the toilet bowl. Allow it to fizz away for about 30 minutes or even overnight. Flush, and enjoy that sparkle!

Mugs With Coffee Or Tea Stains

Fill a stained mug with warm water and add one denture tablet. Wait until the fizzing stops, then rinse the mug. This also works really well on stained tea pots and tea spoons.

Hairbrushes

Fill the sink with warm water and one denture tablet, pull the hair out of your brushes and pop them in the water. Let them sit for at least 20 minutes. Swish them around a bit to make sure they come clean. Air dry them flat on a towel.

Coffee Machines

Descale your coffee machine with denture tablets. Fill the tank with water and add two denture tablets. Wait for the fizzing to stop, then run the coffee maker through a full brew cycle. Rinse out the tank, then run one or two more brew cycles to remove any remaining residue inside the machine.

Kettles

3/4 fill your kettle with water add 2 denture tablets, leave for 15 minutes. Boil and rinse away. Fill again boil and rinse for a sparkling result.

Laundry

Denture tablets can brighten dingy whites add a few denture tablets directly to the drum or fill the sink with warm water, add in one to three tablets let them dissolve then add the white items and soak for at least an hour, then wash as normal.

Baked-On Messes

Baked-on messes in your cookware can be really tricky to remove!You can use denture tablets to loosen up the gunk without all the elbow grease! Just fill the dish with warm water and add one denture tablet. Let the dish soak for 20 minutes, then wash normally.

Shower head

Hard water can easily build up in the tiny holes that the water comes out of. You can get rid of that build up so easily with denture tablets! You’ll need a zip-type plastic bag or a bucket Pour a cup or two of warm water into the back along with one or two denture tablets. Leave a few hours. Then scrub with a sponge to fully clean.

Spacious,Bathroom,In,Gray,Tones,With,Heated,Floors,,Freestanding,Tub,

How to clean a shower

Do you want to get a spotless shower with minima scrubbing, if YES then keep on reading. Your shower surface can attract bacteria, grime and mildew which can be unsightly and make your shower look filthy and very uninviting as well as dirt, dust, hard water spots, soap scum, and other residue such as shower gel and shaving foam can build up in the shower over time,

Here is my step by step guide on how to clean the shower to keep it sparkling fresh in no time at all using simple ingredients.

STEPS TO CLEAN THE SHOWER

Remove all contents such as shower gel, razors etc from your shower and wipe over each item with a warm soapy cloth to remove any soap build-up on the product.

Start by focusing on any mould/mildew build up. Spray directly onto the affected areas white vinegar and then leave to work for 30 minutes before rinsing away, if you have mould/mildew build up on the tile grout then spray the area with white vinegar, then use a grout cleaning brush to scrub in before leaving and rinsing.

If you have stubborn build-up around your taps, dab on a cleaning paste and leave for 10 minutes. Alternatively grab some kitchen paper spray with white vinegar and then wrap around the tap, leave for 10 minutes then rinse and buff dry with a cloth.

Use your preferred bathroom cleaning spray and spray liberally on the glass, walls and floor of the shower. Scrub in using a scrubbing brush, leave the product on for a few minutes to work and then rinse away. Grab a squeegee to remove water from the surface and buff dry with a dry microfibre cloth.

Shower door seal

Remove the rubber seal from the shower screen/door, it should come off easily and then pop it in the bathroom sink filled with warm soapy water. Scrub the seal with a small cleaning brush or recycled toothbrush.

Spritz a dry cloth with vinegar and wipe over the seal then wait until the seal is completely dry before putting back into place.

Shower drain

Use a drain snake poke down your plug hole and pull out any hair and gunk that easily builds up, even if you think your shower is clean I can guarantee you will find gunk.

once cleared either use a bathroom plug unblocker or sprinkle down one cup of bicarbonate of soda, leave 20 minutes then rinse away.

Shower head

Half-fill a sandwich bag (or bucket if the shower head is detachable) with vinegar. Insert the shower head immersing it in the vinegar. Tie the bag with a rubber band to secure onto shower head and sit for an hour (if you have a brass or gold shower head, remove after 5 minutes or keep checking).

If your shower head in a waterfall, drench an old tea towel in white vinegar and wrap around.

Remove the shower head from the bag and use the mini brush to clean build-up. Turn on the water to flush out any mineral deposits. Use a toothpick to poke holes to help remove mineral deposits if needed. Rinse with water.

Finally polish the shower head with a clean dry microfibre cloth.

Lynsey’s Top Tip

Keep a squeegee in your shower and use after each use to remove water and save hard water up.

Employee,Hand,In,Rubber,Protective,Glove,With,Microfiber,Rag,Wiping

How to clean walls

We all know that with kids and animals around the house, it can be really hard to keep walls clean and mark free.

Here are some tips on how to clean walls broken down into categories

INK

It’s always such a joy when little ones begin to express their creativity through drawing, colouring, and painting – unless, of course, they decide to do it on the walls. 

  • Spray some hairspray onto a Cloth then rub it gently over the ink mark.
  • Try some rubbing alcohol/surgical spirit onto a cotton ball and dab it on the ink stain until the stain is gone.
  • Apply some toothpaste to it, leave it for 10 minutes, then wash off with water (this method is also great for wallpapered walls).
  • Apply some eucalyptus oil to some kitchen roll and rub directly on the mark.

CRAYON

Another waxy material the kids like to apply to our walls is crayon you can use Magic Erasers to get rid of crayon without taking off the paint or you can make your own using a dampened sponge dipped into some bicarbonate of soda.

DIRTY FINGER MARKS AND SCUFFS

To get rid of dirty fingerprints, mix equal parts of white vinegar with warm water and wipe down the walls. Another option is eucalyptus oil on a cotton ball rubbed on the fingerprints.

GREASE MARKS

The same vinegar/water solution as above but also add in some lemon juice. Lemon juice is a great degreaser and will shift those stubborn grease marks.

For a general clean and freshen up of your walls you can use sugar soap diluted with warm water, to reach up high use a flat headed mop, but don’t forget to dry dust your walls first of all. Sugar soap helps to improve adhesion and give a better finish when decorating and will effectively remove nicotine marks so a great product to keep in your cleaning cupboard.

Empty,Glasses,And,Wine,Carafe,In,Stylish,Modern,Kitchen

How to clean cloudy glasses

If you are hosting a dinner party or simply just grabbing a glass of water there is nothing worse than dingy-looking glasses.

There is a way to clean up cloudy glasses and limit how often the unwanted haze returns and you can do using staples you most likely already have in your kitchen cupboards.

All you need

How to Clean Cloudy Glasses 

Cloudiness in glassware is usually caused by two things: Calcium and magnesium left behind from hard water. Washing them by hand is the best way to keep them clean and spot-free, but with busy lives the dishwasher makes light work of washing up.

Soak in white vinegar 

You need the white vinegar to be warm before using it as an effective cleaning agent. Fill your sink with hot water and let your bottle of white vinegar soak for one minute. Next, drain the sink and refill it with the now warm vinegar. Just use enough to cover the glasses and then let the glasses soak for one hour. 

Remove the Film 

Take the glasses out of their vinegar, gently scrub with your sponge and rinse with hot water until they are crystal clear.

Dry the Glasses

To dry use a lint free cloth or a flour stack towel, these cloths are perfect and will not leave any fibres behind. Fibres can make your glasses look dingy.

Prevent the Cloudiness From Returning

Since glassware becomes cloudy from dried water droplets, is to prevent water from drying on them in the first place which mainly happens when using the dishwasher. Hand washing and drying immediately is the best solution and will help keep your glasses from getting cloudy.

Cloudiness Could Be Permanent 

If you have tried the above and your glasses are still cloudy after they dry, the condition is likely permanent.

Angle the glass toward the light, if you see shades of pink, purple, brown, or blue this is a sign that your glasses can’t be brought back to life.

Hand,And,Glove,Cleaning,The,Bathroom,Tiles.

How to clean tile grout

Over time, grout can become dirty, mouldy and unsightly. But with the right tools cleaning grout is easy!

If you don’t regularly clean up your grout it can become filthy and hard to clean. There are a few ways to clean stubborn grout, all which include a bit of elbow grease!

Depending on the how dirty your grout is, you can use the following suggestions and see which one works for you…

To begin with, wipe over the grout area you want to clean with hot water, this will help clean and remove some dirt and grime on the surface.

Steam clean

Attach the small hard brush to your handheld steam cleaner and begin by steaming straight onto the grout line. Use the brush lightly and gently scrub as you go. The dirt will be lifted from the grout effortlessly. Finish the job by wiping over with a damp microfibre cloth, use white to see the amount of dirt that has been lifted as this is very satisfying to see.

Shaving foam

This is the cheapest and hassle free way of cleaning grout. Simply apply shaving foam on the grout lines, scrub in using a recycled toothbrush or grout cleaning brush, leave for 10 minutes and rinse with a damp microfibre cloth.

Scrub mommy paste

If your grout hasn’t been cleaned in a while, I find a cleaning paste like the scrub mommy power paste is a quick solution to get rid of dirt and grime. Apply using the provided scrub sponge rub in and watch the dirt lift away.

Powdered stain remover

Mix up with warm water and apply direct to the grout lines. Use an oxi stain remover for best results.

White toothpaste

White toothpaste is a minty miracle, dampen a recycled tooth brush or damp grout cleaning brush with warm water, apply toothpaste just as you would if you were brushing your teeth and work into the grout lines. Leave on the grout lines for a few minutes before rinsing away.

Bicarbonate of soda paste

If you are looking to use a homemade cleaning product mix together bicarb and washing up liquid until you have a nice thick paste. Then apply to the grout lines, scrub in and rinse away. This paste is also great for shinning up sinks and cleaning soap scum lines from the bath.

Whatever method you choose, with the right tools and cleaner you can have your grout look good as new!

Children's,Hands,Decorating,A,Window,Glass,For,Christmas

How to remove sticker residue

Whether you’re dealing with label adhesive on a glass jar that you want to recycle or you have kids who really like putting stickers everywhere figuring out how to remove sticker residue off home surfaces can be challenging.

The good news is………

This all too common job is super easy with the right tools and you probably already have these in your kitchen cupboards.

Olive oil and white vinegar

A winning combination to remove sticky residue from any surface in your home. After applying a thin layer of olive oil to the affected area, simply scrub it with a recycled tooth brush, then, spray the sticky area with white vinegar and gently scrub using a dry cloth.

Then just wash away any lingering oil and vinegar with washing up liquid and dry/

WD-40

WD40 has so many amazing uses but it is also a great adhesive remover. Spray the solvent generously to soak the sticky area. Allow it to sit and work its magic for a few minutes, then use a dry rag or a plastic scraper to remove the adhesive. 

Orange oil

If have any orange oil based products in your cupboard, for restoring wood or an essential orange oil then both these products work wonders. Just soak the area and then scrap the adhesive away.

Rubbing alcohol

Soak a cotton ball or pad in rubbing alcohol, then applying it to the sticker until it’s fully saturated. Repeat twice , use a plastic scraper to slowly peel off the sticker.

Nail polish remover

Add a few drops or acetone nail polish remover to a cotton ball or pad and repeat the above steps.

Want to know how to remove candle wax then check out my how to remove tips.

Want to learn more tips then grab a copy of one of my books and I will show you how to clean your house and tidy up your life

Shelving,Unit,And,Baskets,With,Clean,Towels,And,Toiletries,Near

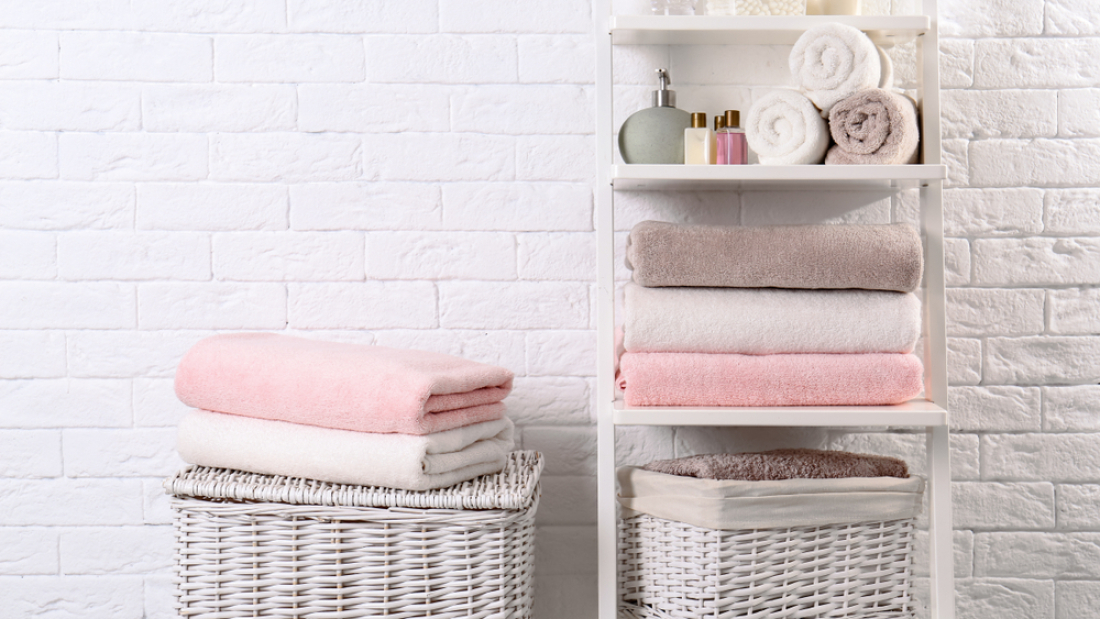
Fresh bath towels

There is nothing worse than pulling a bath towel from the cupboard and noticing that it does not smell clean.

When shopping for new bath towels we naturally steer towards thick absorbent towels as they feel good and dry us off really well but thick towels will hold onto that moisture long after you have used it and moisture leads to bacteria which then leads to unpleasant smells. YUK

Keep your towels well aired in between uses.

When you get out of the bath or shower and hang up your towel you need to keep the air circulating so your towel does not grow any bacteria. If you have a window to your bathroom throw it open, even if it is cold outside you need to dry your bathroom off and get some air through your towels. If you don’t have a window use your ventilation fan.

When drying forget hooks as these do not offer your towels enough air, instead opt for towel rails, this way you can stretch out your towel fully and allow the air to circulate to all off the towel before bacteria starts to grow.

If you have room on your washing line and it is a good drying day pop outside and let it air dry for 30 minutes or so.

How to wash bath towels

Towels are thick, heavy, and designed to absorb water. So when it goes into your washing machine, it’s going to absorb all of the water and laundry products you are using.  The key with washing towels is to never over use laundry products, stick to the correct dosage as displayed on the packaging/bottle. You may think that because they are bigger and thicker than other items you wash that you will need more but trust me you don’t. Using too much product can actually make your towels smell bad!

Make sure not to overfill your washing machine, with towels think less is more. Using the correct dose of detergent and not overloading your machine will help the water evenly distribute and properly rinse those towels. 

Wash towels together and not with other laundry, washing towels with clothes can transfer germs and bacteria between items in the wash. For sanitary reasons, you should always wash bath towels separately from clothing items. Putting towels in their own load also makes it easier to adjust the setting if you are washing different colour towels be sure to add in a colour catcher. It’s also easier to dry towels in the same load since damp towels dry slower than most clothes. Towels will also rub against your clothes, shortening their lifespan.

Say NO to fabric conditioner

Trust me fabric conditioner is doing your towels no favours and will take away the absorbency and the soft bouncing feeling. Fabric conditioner is actually a soft wax coating that conditions clothes, makes them feel softer and loosens fibres. If you loosen the fibres in your towels the absorbency will slowly disappear.

If you are wanting to use fabric conditioner because you want your towels to smell fresh and give the bathroom an added scent then use it in every 3rd or 4th towel wash.

My top tip for soft fluffy towels is to use white vinegar, white vinegar is a natural disinfectant so will add in an extra layer of protection to element bacteria even when washing at lower temperatures and the vinegar will strip away and residue that is in your towels from products.

Don’t worry your towels will not come out smelling of vinegar as the smell disperses.

The DO’s and DON’T’s of fabric conditioner

Shake towels before drying

Give your towels a shake when taking them out of the washing machine. This will help fluff them and aid absorbency. Shaking your towels also helps prevent them from twisting into a ball in the dryer, lengthening their drying time.

How to Dry Towels

Ensure that towels are dry when you remove them from the tumble dryer, keeping in mind that clothes dry quicker than towels so the cycle will be longer. Even slightly damp towels can quickly mildew. The best dryer setting for towels is the regular or automatic setting that you use for other durable fabrics. This will use the highest heat and be most efficient in getting the job done. Avoid over-drying as it can destroy the individual cotton fibers. Use tumble dryer balls to keep the air flowing freely and speed up the dryer time, the balls absorb water and I recommend using 6 dryer balls for a towel load.

Drying outside is always my preferred option for towels, they normally line dry within 3 to 6 hours dependent on the weather, good quality towels will always come in soft and fluffy. If your towels are coming in a little crisp and hard pop them in the dryer for 5 minutes before you put them away or in the bathroom.

If you don’t have a tumble dryer to use over the winter months it is worth bearing in mind that towels can take up to 24 hours to dry indoors, ensure they are well spaced out on a drying rack in a well ventilated space.

Follow Towel Care Instructions

Good-quality bath towels can last for 10 years with proper care. Always check the label on your towels for particular care instructions before proceeding with washing and drying.

I have been a huge fan of Hampton and Astley towels for many years, they wash beautifully. So for me it is definitely worth paying a little extra for good quality long lasting towels.

Want to learn more laundry tips then grab a copy of one of my books and I will show you how to clean your house and tidy up your life

This post contains affiliate links

change_bedding_image12

How often should we wash our bed sheets

This is a question I get asked all of the time and to me the very simple answer is every single week. But this can vary on the type of person you are and how much time you have.

The average time we spend in our beds a week is between 40 and 60 hours. Which is a lot of time for our beds to get dirty and sweaty! Bodily fluids, sweat, hair, dust, dead skin are all factors that make our bedding dirty.

If we don’t wash our bedding on a regular basis, our dirty sheets can result in itchy skin, allergies, acne breakouts, asthma and more. To keep in good health sleep is vital so you need a have a laundry routine that keeps your bedding clean and smelling fresh.

I make a point of doing sheets on a Sunday mainly because I have time this day and it sets me up well for the week ahead. And if you follow along on my socials you will know all about – CLEAN SHEETS SUNDAY!

How Often Should You Wash Your Sheets

Sheets should be washed at least once a week. If you don’t sleep in your bed everyday because you work away a lot or stay with a partner then this could be extended to once every other week. But even when you are not sleeping in your bed a layer of dust will appear on top.

Sheets should be washed more frequently than once every week for some people. Washing every 3-4 days is suggested if you have pets and allow them to sleep on your bed or you suffer with bad allergies.

Also if you have been suffering with a sickness bug, cold or flu as soon as you are feeling well enough it is good to change the sheets and give the bedroom a really good clean and air.

During the summer months when the temperatures are much higher and our bedrooms are hot and sticky we are naturally going to sweat more so on those restless hot nights you may want to wash your sheets a little more regularly or use less sheets to keep you cooler.

Plus, if you suffer seasonal allergies throughout the spring or summer, cleaning sheets more often could help relieve symptoms.

Why Is Washing bed Sheets so Important?

Because it will stop a build up of……………

  • Dust mites
  • Body fluids
  • Natural Oils
  • Dead Skin
  • Sweat
  • Dirt and grime

Which can contribute towards bad health, lack of sleep and even cause your bedding to smell stale!

Most homes have dust mites, which are tiny little critters that we can’t see. They love beds and carpets because they are warm, humid spaces and a shelter from other allergens. This is why NOT only should we change our sheets but vacuum the mattress and headboard too.

These little critters aren’t dangerous but they can cause skin reactions like rashes and itching, and in some cases aggravate allergies. Dust mites can grow at crazy rates and live purely off of dead skin cells. Dust mites in your mattress and bedding can amount to the tens of thousands or even hundreds of thousands at any given time.

Frequent washing of bed sheets can help reduce dust mites and keep your bed fresh and clean.

How To Wash Bed Sheets

Always just check the label to see if there are any specific instructions for the type of bedding you have.

Pick a calming laundry detergent and fabric conditioner, if it always lovely to have a fresh smelling bed and I find using lavender a real calming scent to use which will also help aid sleep.

It always a good idea to also add in some laundry cleanser as this will give you sheets that hygienically clean feeling

To save money and energy it is always best to try and wash at lower temperatures but when it comes to bedding, towels and underwear try and wash at 60 degrees plus.

Other Ways To Help Keep Your Bed Fresh

Before making your bed in the morning let it air ideally with the windows open.

Use pillow and mattress protectors and wash this every other week

Vacuum your mattress a few times a month and allow it to air. a UV one is a great option.

Turn or flip your mattress

Wash your duvet a few times a year

Wash your pillows a few times a year.

Did you know that your pillow will double in weight over a 6 month period due to sweat and fluids!